Showing posts with label DIY. Show all posts

Thursday, June 6, 2013

Lamp Transformation

Our living room is a giant work in progress, but I made one small step recently with a new lamp for our end table. The awesome guy who custom made our kitchen cabinets agreed to make us a small end table/cabinet for our tv components. It has a glass door so you can still use the remotes, but everything is neat and contained, which is the opposite of what it was after the living area was first renovated.

I recently found a GIANT consignment store near our house and I've been going in about once a week checking around for good deals. Last week I decided to see if they had any lamps for cheap and happened upon this little lady who was just begging for some spray paint.


Not that I don't love peachy-mauve... but it wasn't going to work in my house without some new paint. I liked the shape and it was working fine so I figured some spray paint love and a new shade would do the trick. The shade that came with it was so dirty and ugly I left it at the store. I covered the important parts with tinfoil, primed it and gave it two light coats of Rustoleum Heirloom White. 

And here she is now...


Did I mention this lamp was $10 at the consignment shop?!? The shade was $20 at Target and if it looks just a little shiny, it's because I hadn't completely decided if this was the one when I took the picture so it was still wrapped in plastic :) For $33 including the lamp, shade and can of spray paint, I have what I really wanted at a third of the cost. I saw a similar lamp online at Ballard Designs, but with two small (and sometimes clumsy) children, I don't need a $219 lamp in our main living area! 

Now I need to figure out the wall behind the sofa and we'll be on our way to finishing this room (at least for now!)

I'm still so happy when I look at the before and after...
Thanks for stopping by!


Linking up to...

Monday, November 19, 2012

DIY Chalkboard Welcome Sign

If there's one thing I've learned from all the amazing blogs out there, it's that often you can make something more easily than you think for less money than it takes to buy it. It might take a little more time than just grabbing it off the shelf, but in the long run, you are saving money and I personally take a lot of pride in my DIY projects. I look through catalogs, magazines, blogs and of course Pinterest to find inspiration and a lot of instructions on how to do things on my own.

After Halloween, I stopped into Michael's and found this little beauty for $1.89. You can see the upside down price tag showing it was originally $8.99. It's not hideous, but I wouldn't spend nine bucks on it. But for $1.89, I saw this with a different purpose in mind.
All I did was cover it with a coat of black chalkboard paint. I did brush a second coat on a couple spots where the brighter color was still showing through, but that's it. So easy! Then I picked up some cool chalkboard pens at Michael's using a coupon and voila... a new chalkboard sign. I like that the pens make the white a little bolder and they still wipe off with a wet cloth.
I hung the sign above some family pictures on a little wall near our front door. I like that I can change up the message and I love that it cost me $6, including the small can of chalkboard paint that will be used for other future projects I'm sure.
The full wall gives a better idea of the proportions of the display. The front door is to the left of this wall and the garage door is to the right. The photos and the chalkboard sign feel like a nice welcome to our home.


Linking up to...

Becoming Martha

Tuesday, November 6, 2012

Fall Porch Decor & A Little Tutorial

Halloween is over and most of the stores are jam-packed full of Christmas decor now, but I'm not quite ready to roll out the garland and ornaments quite yet. Fall decor feels more appropriate for the weeks leading up to Thanksgiving. Yesterday I showed off our fun Halloween set-up; I'm still patting myself on the back for coming up with the pirate ship idea :)

After Halloween, I ditched the skeleton and brought our front doorstep back to regular fall status. We had a couple smaller pumpkins leftover so I left them for now. With just a few simple and inexpensive items, we now have a lovely and welcoming front stoop.

Monday, November 5, 2012

Post Halloween

Even with a self-imposed time out this weekend, I didn't want to skip a post sharing our fun Halloween decor. I don't do much inside the house since the kids are still pretty young, but this year I took on the outdoor responsibilities. With the help of my sister who was visiting for the week, my plan worked out pretty well if I do say so myself (plus we got a lot of compliments from trick-or-treaters!)

The only sad part is that the day was so busy that we took only a few pictures so it's hard to see it all in action. But at least these give you the idea. We don't usually put up our Halloween stuff outside until the day before or the day of and usually the hubs takes charge, using a wide array of random Halloween decorations. This year with mama running the show, I decided we needed a theme!

Wednesday, August 29, 2012

The Command Center

Recently I shared our new week-at-a-glance calendar that I nicknamed "mission control" and today I'm going to show how I made our new "command center." Apparently I think I'm working for NASA over here!

The school year is off to a good start and the new calendar has been a great way to keep track of what's going on this week. But we also need a spot for all the other crap that needs to be organized and easy to find. You know, emergency info, babysitter info, etc. I wanted a bulletin board for our command center, but I didn't want to hang a boring old cork board in my lovely new kitchen so instead I got a little crafty.


Supplies
Cork canvases
Fabric (as much as you need for the size and number of your canvases)
Spray Adhesive
Staple gun & mid-weight staples or a hammer and brads or small nails
Ribbon, etc for trim (optional)

I started out with two 13x13 cork canvases that I found at Joanns for about $8. I wanted something with a little dimension and the canvas style was perfect. I also found a fabric I liked at Target... in the curtain aisle. Sometimes fabric pops up in unexpected places!


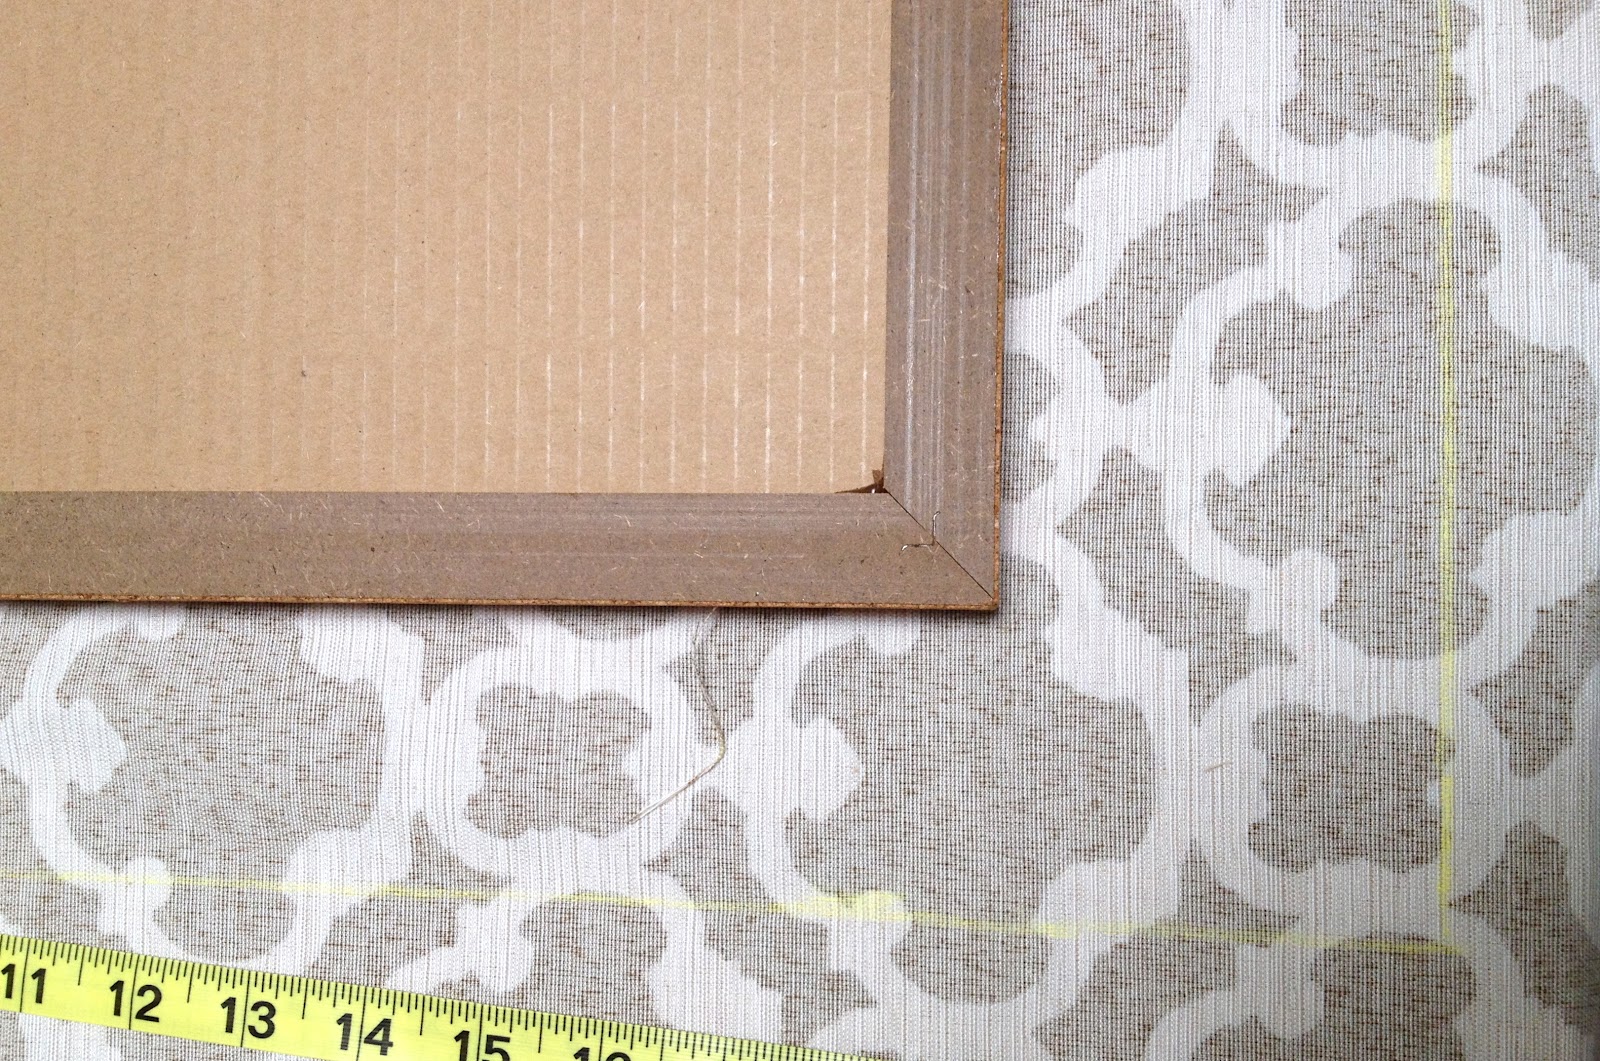
Lay the cork board on the fabric, wrong-side up, using the hemmed edges as a guide. 
Measure about 3 1/2" from the larger seam so the fabric wouldn't lay to thick on the finished side of the cork. I only measured in about 2 1/4" from the smaller seam because obviously there isn't as much thickness to worry about.


You can use chalk or anything that won't bleed through the fabric to mark out cutting lines so the fabric wraps all the way around the canvas. Then trim along the lines.


Coat the cork with a thin coat of spray adhesive and center on the fabric, making sure that the pattern is running straight across the front of the cork board. If the pattern is lopsided, it will look funny when the cork board is hanging. 

Then wrap the edges of the fabric over the back of the cork board and staple along the edges using a staple gun. You could also use small finishing nails or brads, but a staple gun is faster and easier (and not very expensive). Staple fast... the baby will be waking from his nap soon!


Staple two sides that are opposite one another, being sure to pull the fabric taut. On the ends, I tucked the corners in like I was wrapping a present and folded it over as I stapled along the edge. Once everything is stapled down firmly, trim the excess fabric. 


The cork boards that I bought came with Command strips for hanging. I figured since nothing too heavy will be hanging on these boards, I'd give it a try. I can always attach picture hangers later but for now here's hoping they just stay up without any nail holes. 

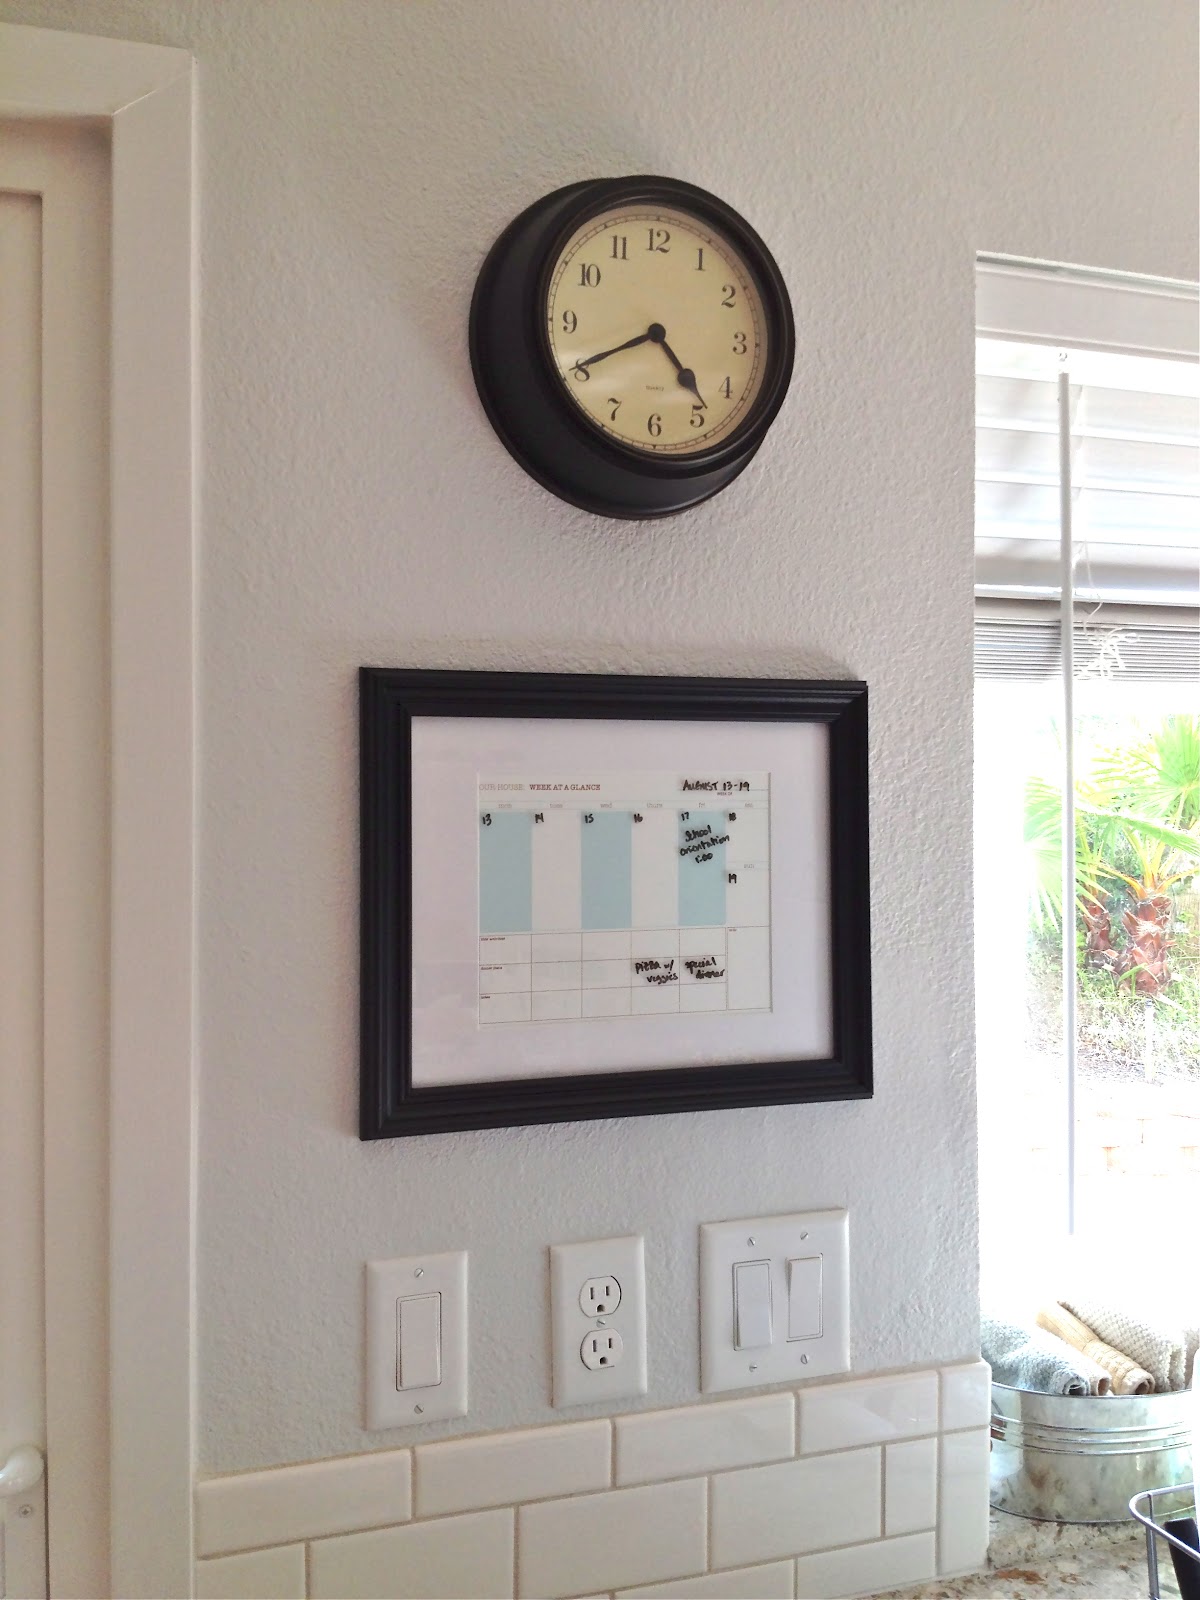
Next to our bulletin boards, I put up a new calendar that I printed out on mid-weight cardstock from a blog I found on a link party. I can't find the link now though so if it looks familiar, please let me know so I can give credit. The calendar is super cute and FREE and runs August 2012 to July 2013. 

Obviously more will be going on the bulletin boards, but I really wanted to snap a picture of the project before it becomes a cluttered mess organizing masterpiece. Here's our new command center!


Linking up to these awesome parties...

   Home Stories A2Z   The 36th AVENUE   Becoming Martha

Friday, August 17, 2012

Mission Control

I don't know what it is about a new school year, but it makes me want to reorganize every square inch of our house! I've been on an organizing rampage... not that you can tell for the most part because everything is "in process"or at least that's what I keep telling my husband ;)

One thing we don't have since we renovated the kitchen is a family message center. I've been on a mission to get this set up before school. I really wanted to have a weekly preview calendar in addition to a regular monthly calendar. I think it will be helpful, especially for me, to see what's going on for the current week.

I found a great printable week-at-a-glance calendar at Mommy Tracked. They have a bunch of other options but this one looked like it would work best for us. It has a space for each day of the current week, plus small sections for kid's activities and the dinner plan for that day.


I printed the calendar out on card stock and framed it in a simple, black frame I picked up for $5 at Walmart. It's pretty lightweight so I just used adhesive Command strips to mount it on the wall. There are so many cute options for making your own vinyl calendar, but this is a really easy and quick alternative that still allows you to use dry erase markers on the glass in the frame.


I like that the frame makes it blend in a little better and that it puts our weekly plan front and center. Hopefully this will help us stay on top of all our activities!

Linking to...


Positively Splendid The 36th AVENUE It's Overflowing

Wednesday, August 1, 2012

Fixing A Fidgety Duvet

In our house, all our beds are made with duvets rather than quilts or comforters. It's just a personal preference for both me and the hubs. But while they are warm and squishy and comfy, duvets can also be a major pain in the rear. They shift and shuffle around inside the covers until one of two things happens. Either one person has all the comforter and the other person is basically under a sheet OR the duvet shifts to the bottom of the bed and the top portion is thin and empty. So what can you do?

Word on the street is that some duvets come with built in corner loops and some duvet covers come with ties sewn into the corners and sides to keep your comforter from fidgeting around inside its case. That would be most helpful. However, if your duvet and/or cover didn't come this way, as ours didn't, you can do this on your own quickly and easily. 

What You Need:
*scissors
*thread (I used white)
*a small needle
*strips of ribbon cut to about 18" for the ties (for a king comforter I used 7)
*strips of ribbon cut to about 6"for the loops (one for each corresponding tie)

Lay out your duvet cover inside out on the floor. Then lay your comforter on top of the cover, matching up the sides and corners. 

Starting with the top-most corner (as it will lay on your bed), fold one of the 18" pieces of ribbon in half and hand-stitch to the outer edge of the corner of the duvet cover. I doubled up the thread to make the stitches stronger. You're just using a simple stitch to hold the ribbon in place, nothing fancy. Trust me - if you could see this up close serious seamstresses would be horrified! 


I stitched a tie in each corner and then one in the center of each side except where the cover opens at the bottom. 

Next, take one of the 6" ribbon pieces and fold it in half. Stitch the folded "loop" in each of the corners of the duvet itself, being careful to match up the placement of the loops to the placement of the ties on the cover. 


Once you're done stitching all the ties and loops in place, just slip each of the ties through the loop and tie a nice tight bow. You could knot it too, but I wanted it to be easy enough to remove for washing.


Here's mine back on the bed. Easy as pie and now the comforter won't be slipping all over the place. No more shaking it out every couple days to get it back in place! 


Linking up to...

Positively Splendid The 36th AVENUE
Related Posts Plugin for WordPress, Blogger...

Share